Features


Solutions
Who uses Directual and why?


What can be built on the platform?



What industries benefit from Directual?

Learn


This lesson covers a few practical approaches to handling data in JSON format.
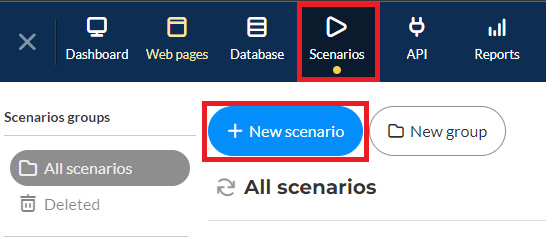
First, you’ll need to create a new scenario that will handle all new incoming objects. This scenario will work with the Incoming Data structure and the New objects trigger.
Go to the scenarios section and create a new scenario for parsing new incoming data.
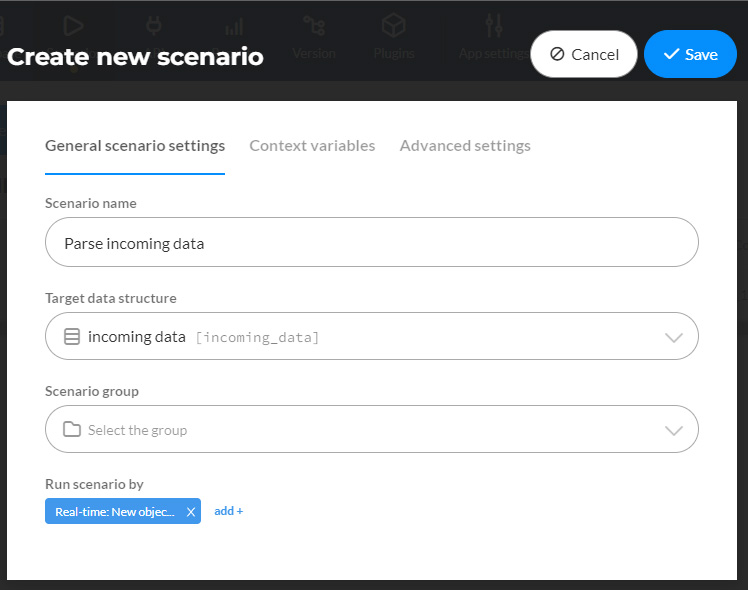
Next, configure general settings by naming the scenario and selecting the necessary target data structure and the trigger. In this example, the name of the scenario is Parse Incoming Data. Its target data structure is Incoming Data, and this scenario is triggered by the New objects trigger.
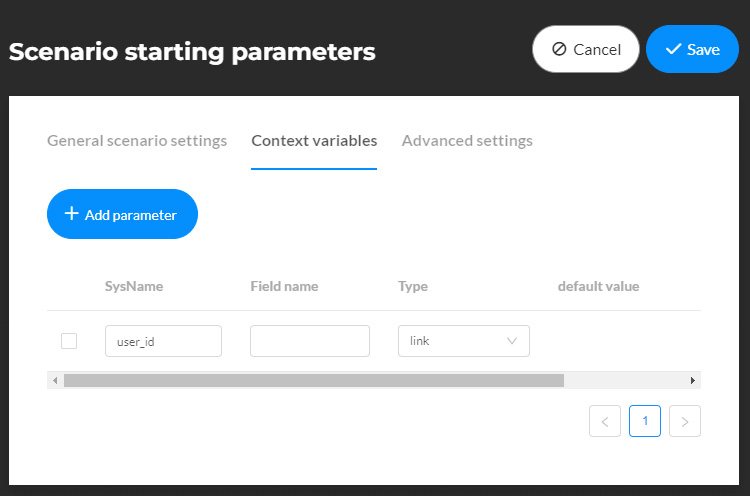
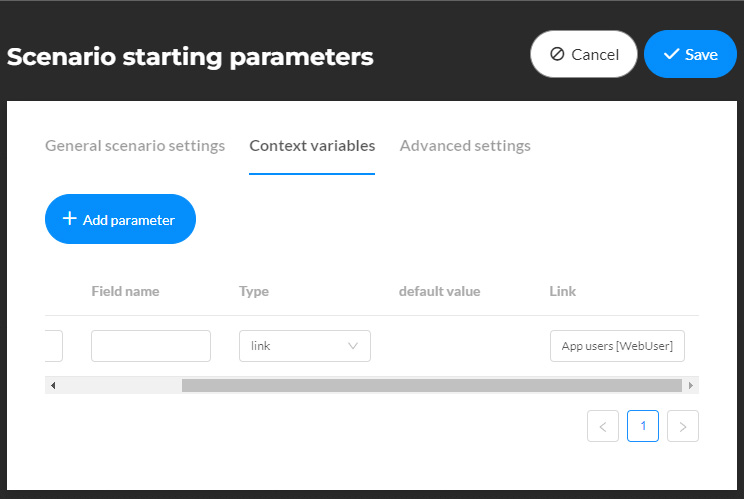
Next, add a context variable → SysName: user_id, Type - link, Link - App users [WebUser].
You will need it to pull the ID from a JSON.
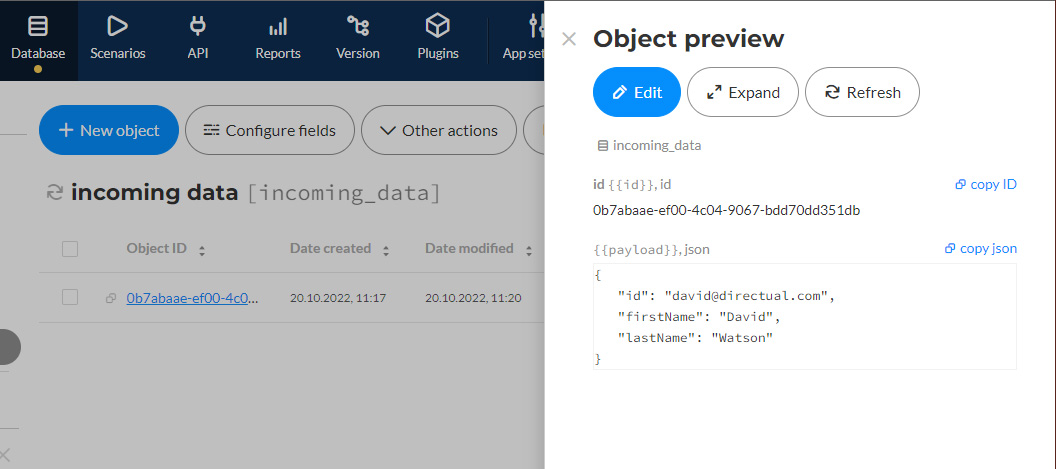
An example of a flat JSON
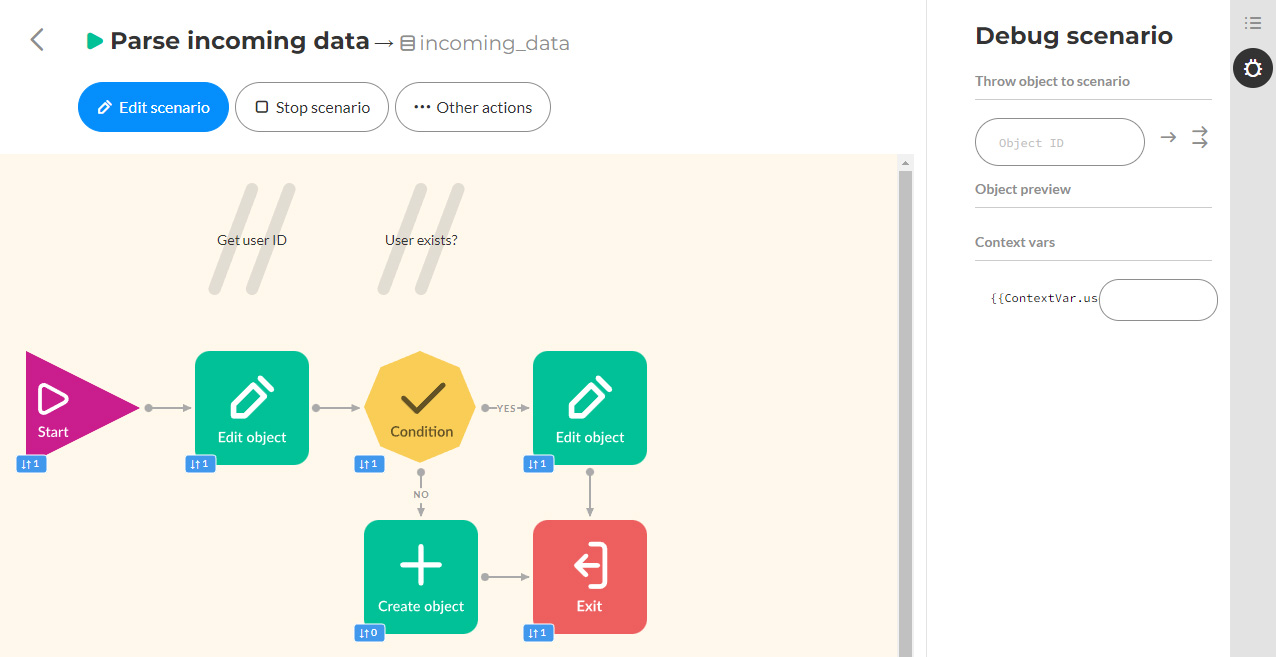
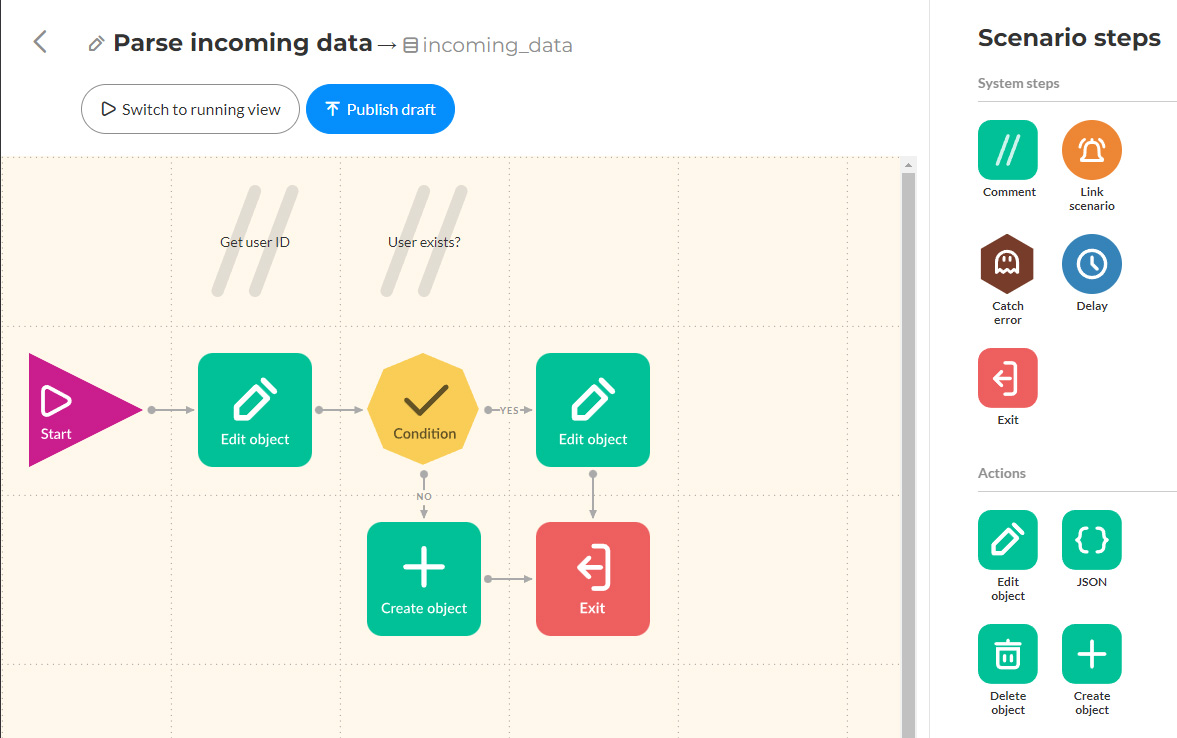
Open the scenario and add the edit object step by dragging it to the canvas. Don’t forget to add comments to make the scenario easy to follow in the future.
Now configure the edit object step to write data from a JSON into a context variable to get the ID. Don’t forget to disable smart inputs to use the templating tool for the JSON. The field with the JSON is called Payload – {{payload.id}}.
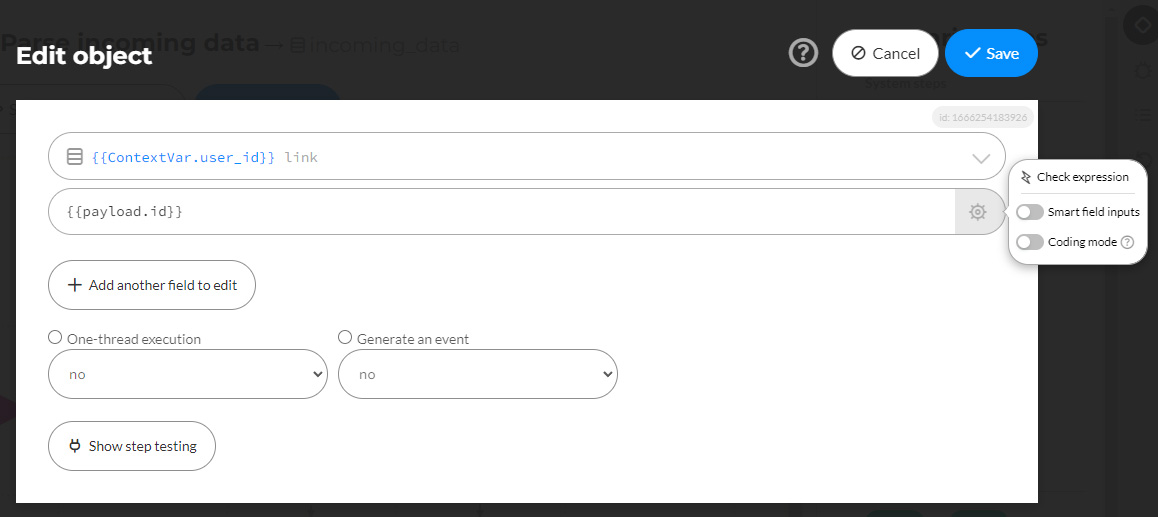
There are two different ways to handle data in JSON format, you can find more in the documentation.
Next, add the condition step and configure it to check whether such an object with a user already exists. Once again, don’t forget to add comments.
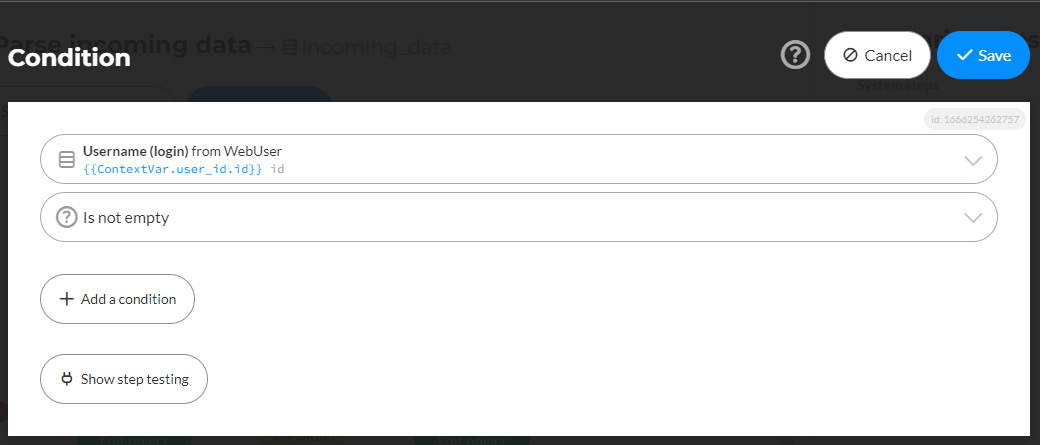
The idea is to go to the User via the link and check if its ID is filled. If it is not empty - it means such a user already exists. If it is empty - there is no object, and we will have to create it. If the object doesn't exist, we use the Create Object step. If the object already exists, we will change its fields with the Edit object step. The scenario stops when both steps are processed.
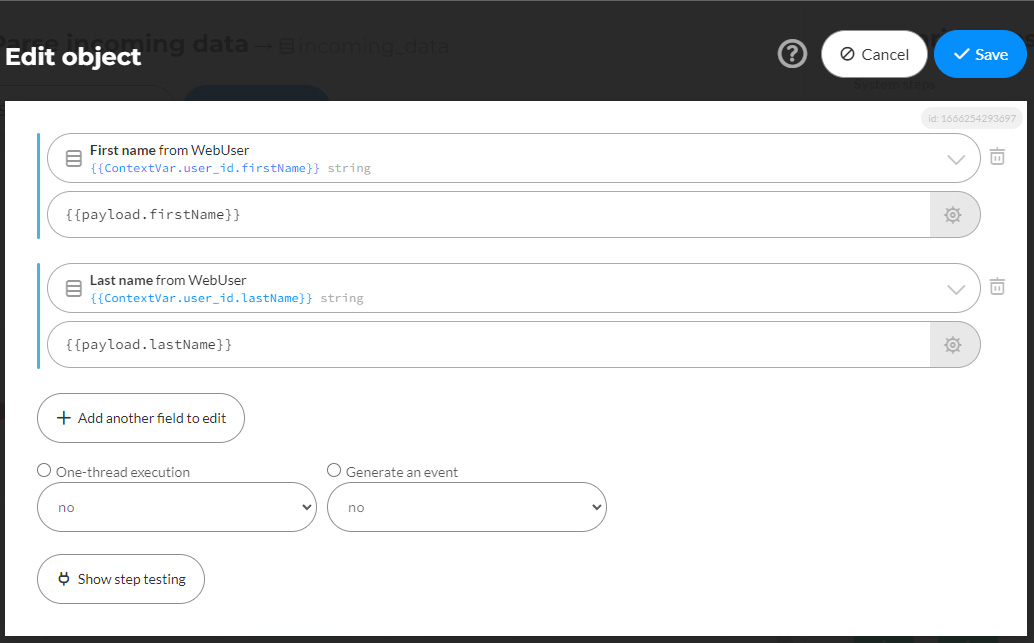
Next, configure the edit object step. Change the First name field of the user object our context variable refers to, and write data from JSON into it using the templating tool to pull that field from JSON. The Edit object step allows us to change multiple fields at once. In this case, we change both the First name and Last name fields.
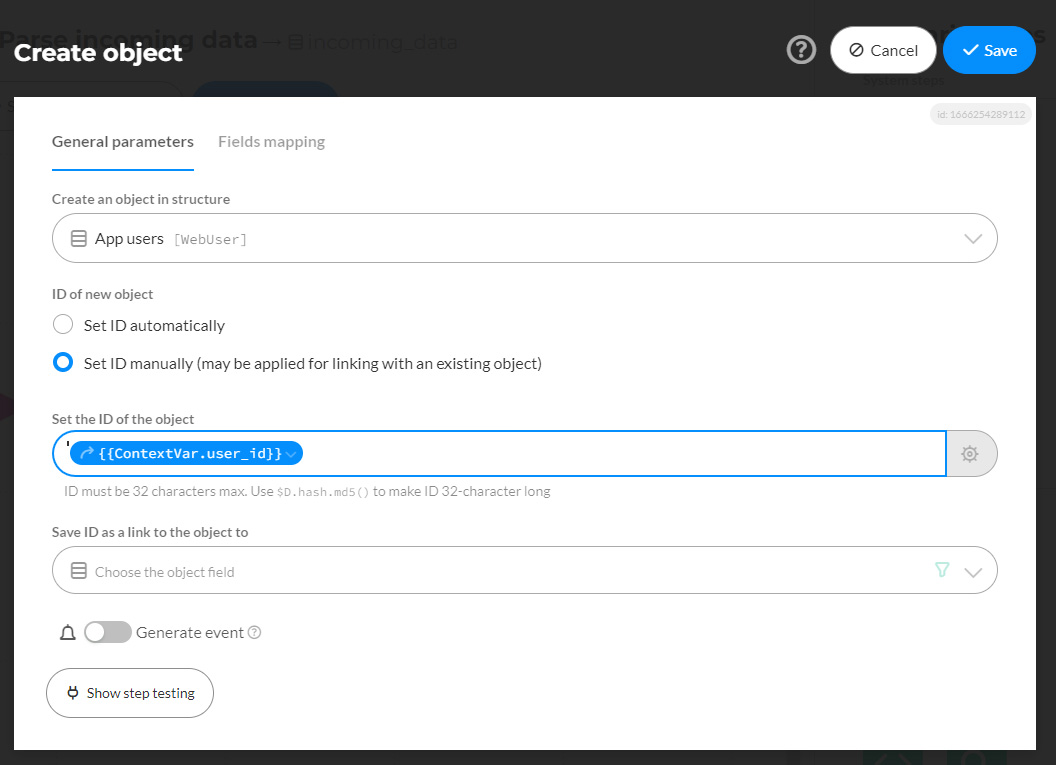
Now let's configure the create object step. Create an object in the WebUser structure. You know in advance the ID of the object to be created, so choose the Set ID manually option. You’ll get the value from the context variable to the ID. It is not necessary to save it somewhere because you already know the ID. The option to generate an event or not affects other scenarios. For example, if you want to make some scenario that triggers the creation of a new object, you will need to enable that option.
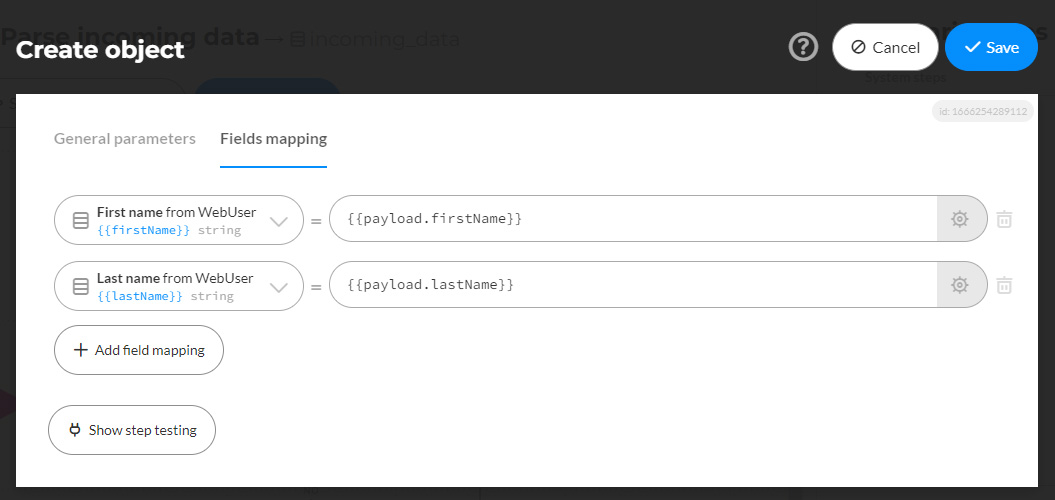
In the second tab, you can configure the field mapping. Save the First name and Last name from our JSON into the newly created object.
Publish the scenario and run it. It will react to all new objects. To run an existing object through it, copy the ID of that object and run it through the scenario via the debugging menu.
Now, look at the logs to see that everything worked well. You can also look at the counters on the steps and see the path of the object. Let's check the App Users table. A new object with the first name and last name was successfully created — it’s David Watson.
In the expanded object card, you can see all versions of that object, as well as links to the scenario or endpoint that modified/created the object. In this case, you see the scenario and the Create object step.